
⚡ Quick Answer
A bad LoRA is almost always a bad LoRA training dataset, not bad settings. For a character or product, use 15–30 clean, varied images — close-ups, medium shots, and full-body, from multiple angles — resized to your base model's native resolution (usually 1024×1024). Style LoRAs need more: 50–150 images. More images with low variety produces a worse LoRA than fewer images with real coverage.
Your LoRA looks blurry. Or it nails the face but breaks on hands. Or every output looks like the same three training photos wearing different clothes. Before you touch rank, alpha, or learning rate, check your LoRA training dataset— that's where most bad LoRAs actually go wrong, and it's the one part of training that has nothing to do with your GPU or your trainer's settings.
This guide covers exactly how many images to use, what resolution to prepare them at, and why a handful of varied photos beats a big pile of near-duplicates every time.
How Many Images Do You Actually Need for LoRA Training?
The right number depends on what you're teaching the model. A character or product LoRA — a specific face, mascot, or item — needs far fewer images than a style LoRA, which has to cover a much wider range of subjects while keeping one consistent look.
| LoRA Type | Image Count | Why |
|---|---|---|
| Character or product | 15–30 images | A single consistent subject needs coverage, not volume — past ~50 images you hit diminishing returns |
| Style | 50–150 images | The model needs to see your style applied across many different subjects to learn the style itself, not one specific image |
Going over these numbers isn't harmful by itself — the real risk is what usually comes with a bigger dataset, which is more near-duplicate images. That's covered in the variety section below, and it matters more than the count on its own.
What Resolution Should Your Training Images Be?
Every base model has a native resolution— this is the image size it was originally trained at, and it's the resolution it learns best from. Training on images far below that resolution, or on upscaled images pretending to be high-resolution, teaches the model blur and softness along with whatever you actually wanted it to learn.
| Model | Recommended Resolution | Note |
|---|---|---|
| Krea 2 | 1024×1024 | Skip 768px — community testing has reported inconsistent results at that size on Krea 2 specifically |
| Ideogram 4 | 1024×1024 | Matches its native training resolution |
| Flux 2 | 1024×1024 | Matches its native training resolution |
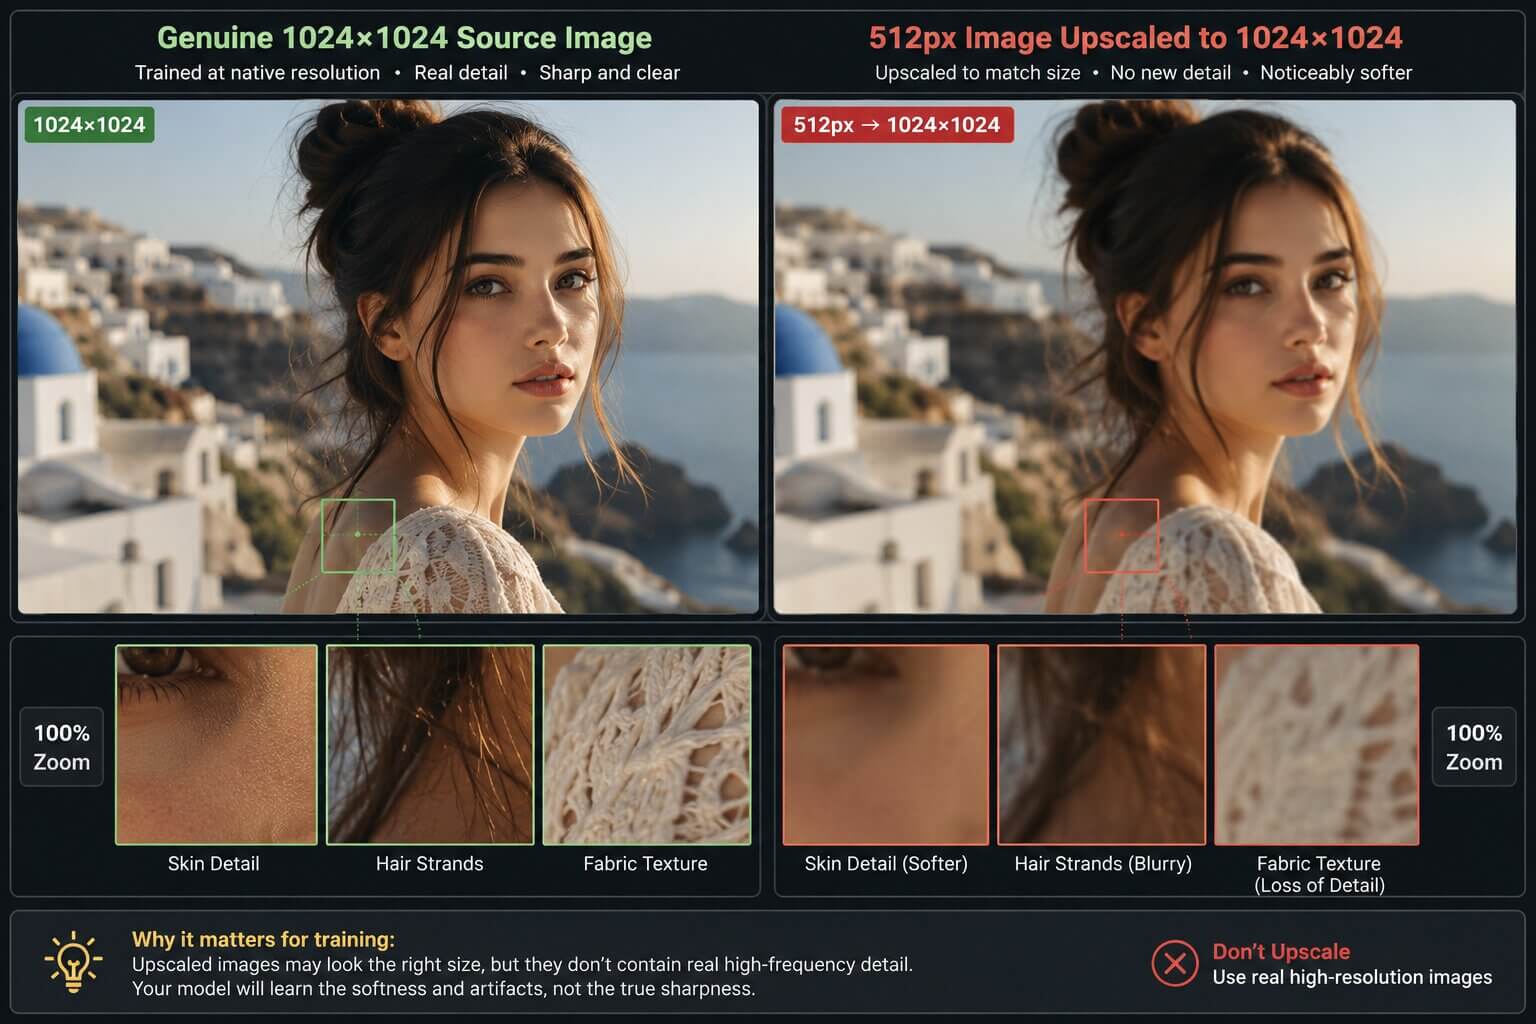
Most trainers, including AI-Toolkit, don't require every image to be the exact same pixel dimensions — they bucket different aspect ratios automatically during training. What matters is that each image is genuinely close to your target resolution, not stretched or upscaled to fake it.
Why Variety Matters More Than Image Count
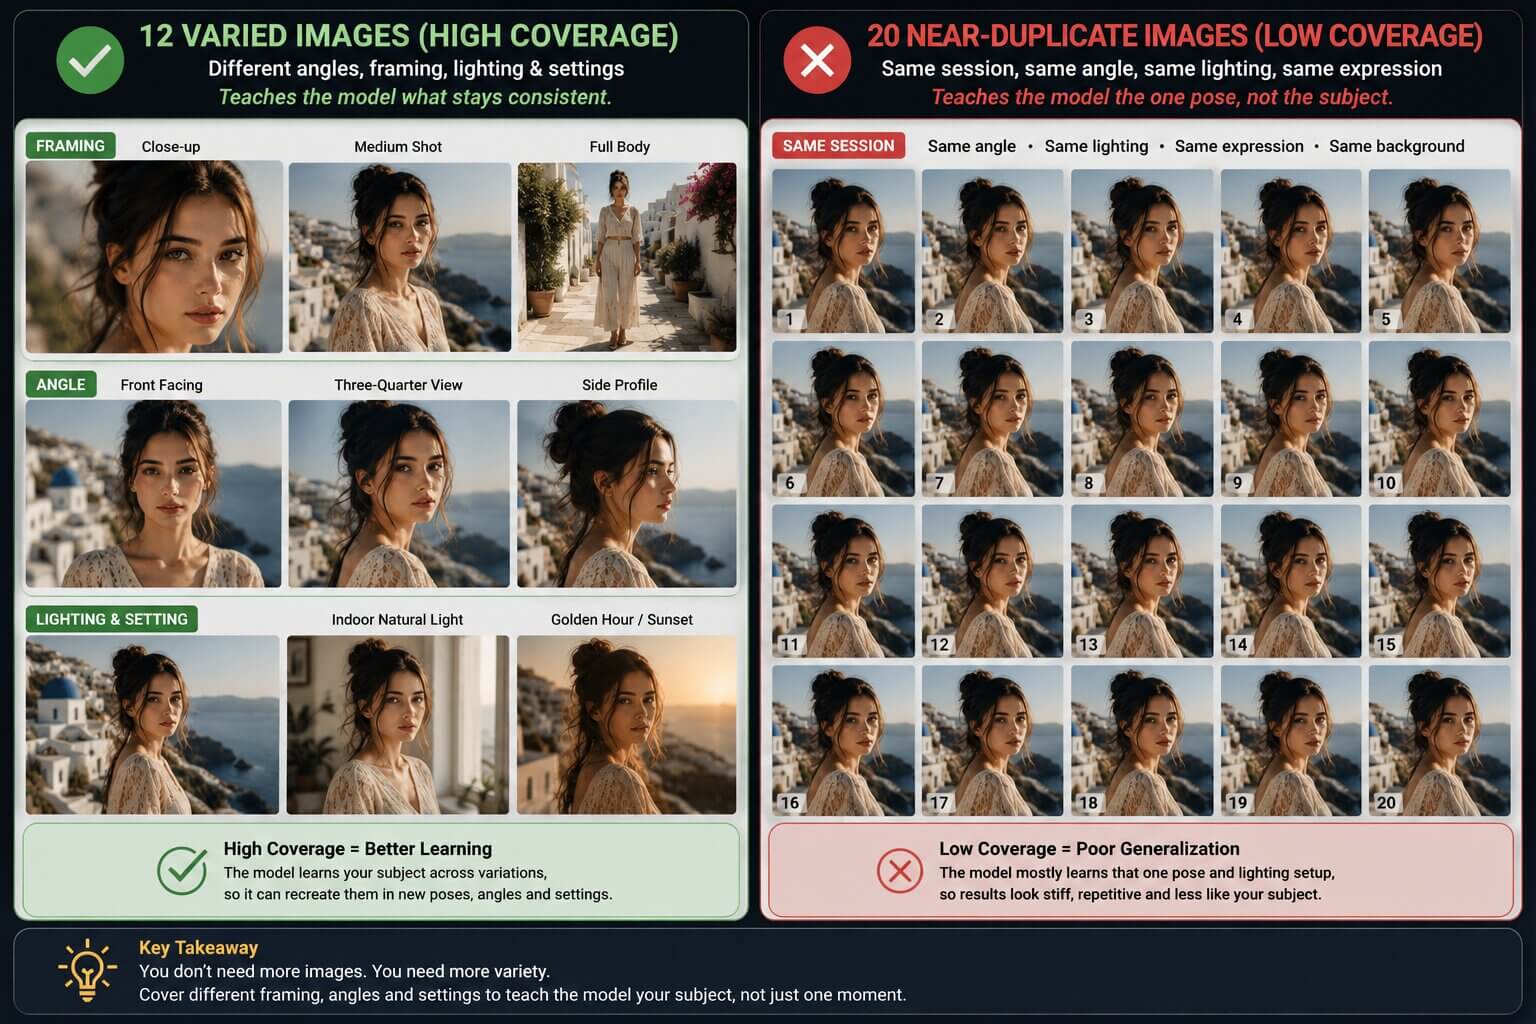
This is the single biggest reason LoRAs turn out bad: the dataset has enough images, but they're all nearly the same shot. Twenty photos from one phone session, same lighting, same angle, same expression, gives the model far less to learn from than twelve genuinely different images — because the model isn't learning your subject, it's learning the one pose you happened to photograph twenty times.
Coverage means your dataset includes different framing and different angles of the same subject, so the model learns what stays consistent (the actual subject) instead of what happens to repeat (one specific pose or lighting setup). Aim to cover:
- Framing: close-up, medium shot, and full-body
- Angle: front-facing, side profile, and three-quarter view
- Lighting and setting: more than one location or lighting condition, where possible
What Makes a Training Image "Bad" — Even If the Subject Looks Fine?
Some images quietly wreck a LoRA even though the subject in them looks perfectly good. These issues are easy to miss when you're scrolling through your own photos, because you're looking at the subject, not the technical quality of the shot.
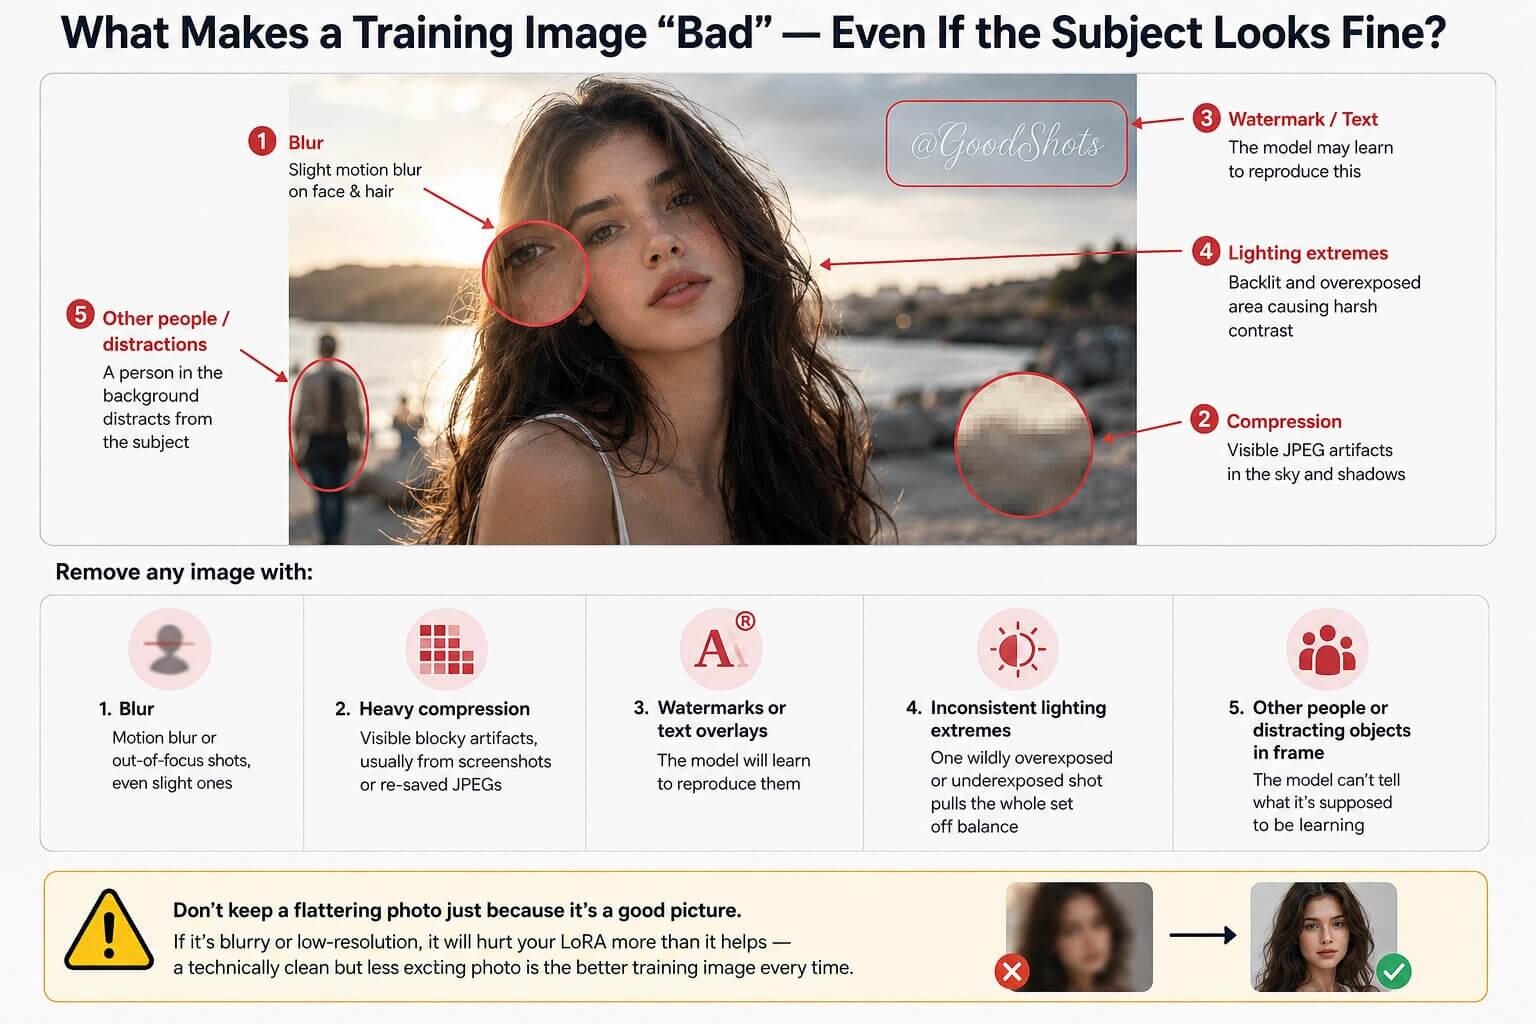
Remove any image with:
- Blur — motion blur or out-of-focus shots, even slight ones
- Heavy compression — visible blocky artifacts, usually from screenshots or re-saved JPEGs
- Watermarks or text overlays — the model will learn to reproduce them
- Inconsistent lighting extremes — one wildly overexposed or underexposed shot pulls the whole set off balance
- Other people or distracting objects in frame — the model can't tell what it's supposed to be learning
How to Organize Your Dataset Folder Before Training
Once your images are selected, cleaned up, and resized, your trainer needs to be able to read them correctly. Most trainers, including AI-Toolkit, expect each image to sit next to a matching caption file with the same filename.
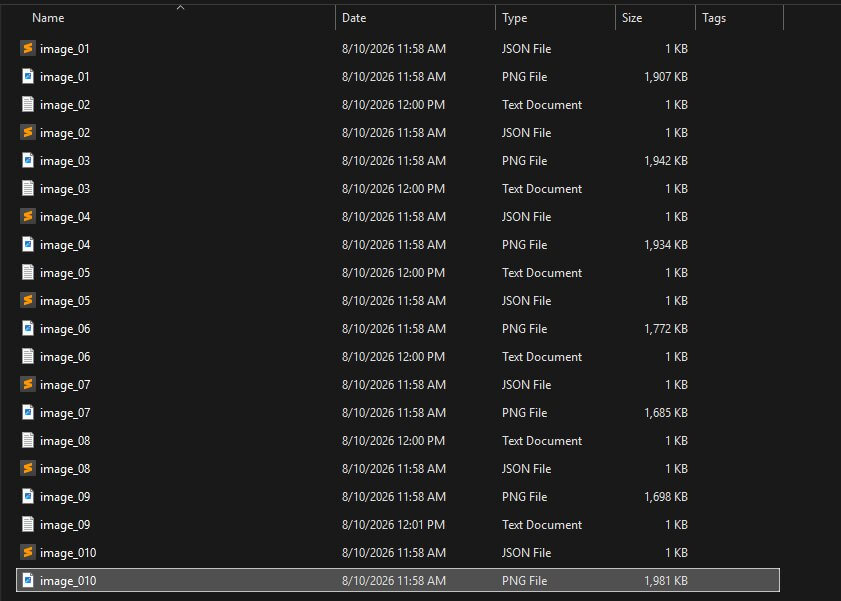
What actually goes inside each caption file — and how to write captions that help rather than confuse your trainer — is covered in a dedicated guide, since captioning has its own set of rules worth going through properly.
Common Dataset Mistakes That Ruin a LoRA
My LoRA only reproduces one pose or angle
What causes it: Low variety in the dataset — most or all of your training images share the same pose, angle, or framing.
How to fix it: Add images covering different angles and framing (see the variety section above), then retrain. There's no settings fix for this — the dataset has to change.
My LoRA looks blurry or low-detail
What causes it: Low-resolution source images, or images upscaled to look higher resolution than they actually are.
How to fix it: Replace any upscaled or sub-1024px images with genuine full-resolution source photos, matched to your base model's native resolution.
My LoRA is "overcooked" — faces look distorted, colors are wrong
What causes it: Too many near-duplicate images, or too few images repeated too many times during training.
How to fix it: Prune duplicate or near-identical images from your dataset and prioritize variety over raw count — a smaller, more varied dataset almost always fixes this.
Frequently Asked Questions
What to Do Next
Sort your existing photos against this checklist before you gather anything new.
Most people already have more usable images than they think — the real work is cutting the ones that don't belong. Once your dataset is sorted, captioning is the next step.
Published: 2026-08-15 · Last updated: 2026-08-15
Join the discussion
Sign in to leave a comment or reply
No comments yet
Be the first to share your thoughts!